HOT
 Production-Quality Lenses Directly from SLA 3D P…
 Forging Ahead with Solar Energy and GibbsCAM CNC…
 GibbsCAM Software Helps Race-Team Mechanics Beco…
 Metro Aerospace Introduces 3D Printed Part for F…
 GibbsCAM Enables Rover Exploration Vehicle Parts…
 Designing a Custom Boot for an Injured Penguin
 Asano Uses Geomagic 3D Scan Software to Drive In…
Impossible Creations Calls on 3D Systems’ Digital Workflow for the King’s Car
Versatile design and manufacturing solutions offer compelling benefits for unique challenges. Just ask Impossible Creations, a custom scan, design and modeling firm out of the UK that specializes in helping its customers create without limits. In a recent project to restore the Britannia-upon-Globe mascot that symbolizes the King’s Car in Great Britain, Impossible Creations used an innovative 3D scan to CAD to print workflow powered by 3D Systems solutions to create an accurate 3D replica of a design that would otherwise be lost to history.
The personification of the United Kingdom
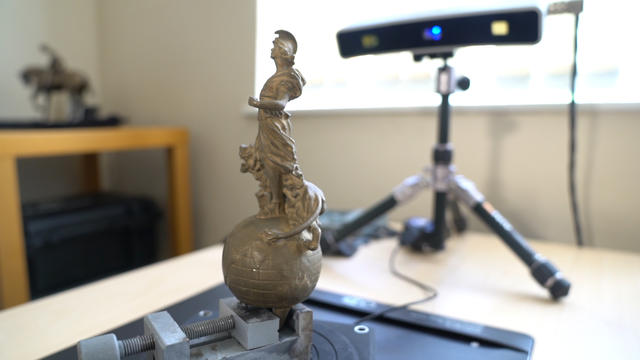
Britannia is the female personification of the United Kingdom who is often depicted with a trident spear in her hand and a lion at her feet. Around 1920, an unknown sculptor carved a bronze statuette of Britannia standing upon the globe. An apprentice made a smaller bronze copy that was coated with nickel for use as the mascot, or hood ornament, on whatever vehicle King George V was riding in.
In 1926 George’s son, Edward Prince of Wales, commissioned a one-of-a-kind Rolls Royce known as RF 14. When George V died in 1936, Edward acceded to the throne as Edward VIII. The Britannia mascot was moved to the RF 14 to signify that it was now the King’s Car. In less than a year, Edward abdicated the throne to marry the American divorcee Wallis Simpson and spent most of the rest of his life living abroad.
Restoring the King’s Car
The Britannia mascot then rode on the vehicles of George VI, who succeeded Edward VIII, and later on those of Queen Elizabeth, the Queen Mother. The same mascot now sits on Charles, Prince of Wales' cars. In the meantime, the RF 14 fell out of repair and disappeared. In the 1990s, Ted Overton of Overton Vehicle Overhauls stumbled on the car in a pile of old farm machinery on a Suffolk farm. Overton purchased the car and has spent the past two decades lovingly restoring it to its original condition. Only one part was missing – the mascot – and Overton was determined to restore it to its position of honor.
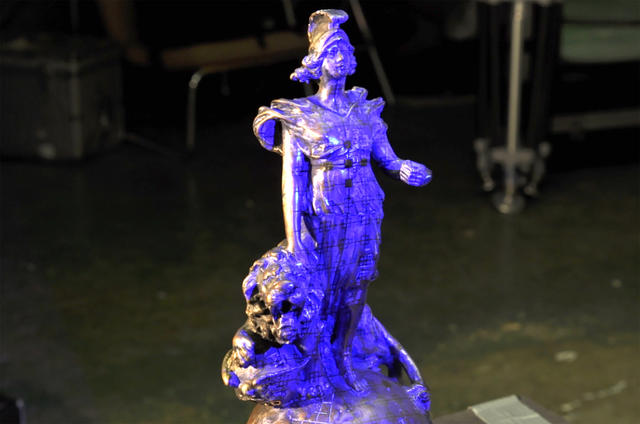
Overton discovered that the original sculpture the mascot had been copied from resides in a vault in the basement of the National Motor Museum in Beaulieu, United Kingdom. The museum agreed to let him scan the sculpture, but when Overton examined it he was not happy with its condition. Also at this point, Overton had no way of knowing the size of the mascot. Through a friend, he got in touch with a mechanic of the royal fleet of vehicles who passed the request on to Prince Charles. Prince Charles sent word back that the mascot was 200 mm high, half the size of the original sculpture.
Putting the mascot in its rightful place
Looking for a contractor that could create a perfect copy from the flawed original, Overton selected Impossible Creations, a Brentwood, UK, firm that offers a reverse engineering service based on 3D Systems’ complete digital workflow. Impossible Creations’ team began by scanning the sculpture with a Geomagic Capture™ 3D scanner which offers a resolution of 0.110 mm and an accuracy of 0.0.60 mm. “The Geomagic Capture scanner provides the extreme level of detail and accuracy needed to capture the fine details on the sculpture,” said Ian Carter, owner of Impossible Creations. The team ran the scanner at the highest possible level of resolution and imported the resulting point cloud into Geomagic Wrap® software where they converted the point cloud to a 700 Megabyte STL mesh.
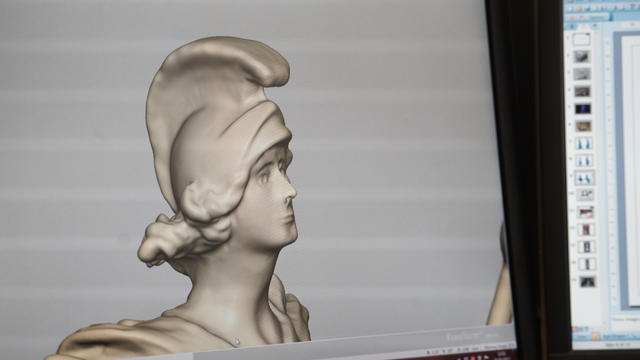
The team then imported the mesh into Geomagic Freeform® design and sculpting software. “The sculpting tools in Freeform are the digital equivalent of working with your hands with a piece of clay,” Carter said. The Impossible Creations team used a 3D Systems Touch™ haptic device which provides force feedback to create the physical sensation of sculpting in a virtual environment. Using a variety of Freeform tools with the haptic device including scalpels and scrapers of different sizes, the team worked its way down to progressively smaller tools to enhance the fine details, finishing with tools around the size of a pinhead.
Britannia is wearing sandals but Carter was not satisfied with the intricate details so the Impossible Creations team used Freeform’s carving tools to distinguish the individual toes. The hand that holds the trident was originally in an unnatural position so they moved it into a more natural position with the haptic device. They also separated her individual fingers, which blended together in the original scan. They tweaked the details on her face, reducing the size of her nose and adding detail around her eyes.
“Whenever we did something that didn’t come out quite right, we pressed Control-Z to undo the move and redid it until we got it right,” Carter said. The team designed the mounting hardware in SOLIDWORKS CAD system and exported STEP files which were imported into Freeform and subtracted from the Britannia model. Freeform was then used to reduce the model to half its original size.
Nearly indistinguishable from an injection molded part
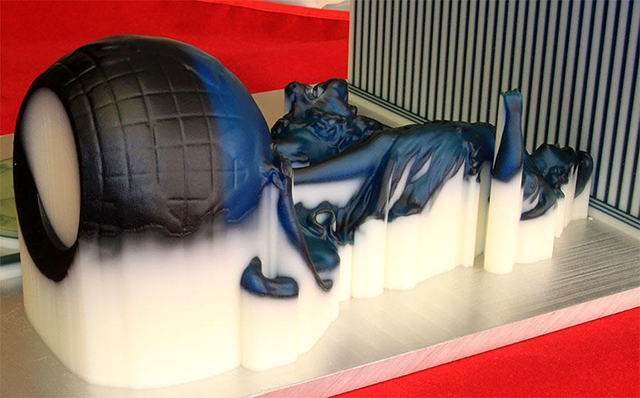
The next step was 3D printing a plastic model that would serve as the pattern for metal casting. The printing process had to hold the extremely small details created in Freeform while creating a surface so smooth that it did not require secondary finishing. Finishing had to be avoided because the details in the model are so fine that it would have been extremely difficult to perform any finishing without damaging them.
The Impossible Creations team addressed this challenge by printing the master pattern using 3D Systems’ MultiJet Printing (MJP) technology in XHD mode which prints at 750 (x-axis) by 750 (y-axis) by 1600 (z-axis) dots per inch (dpi) in 16-micron layers. “The machine delivered the level of detail and surface finish we needed on both the visible and the mounting sides of the pattern,” Carter said. “The end result is difficult to distinguish from an injection molded part.”
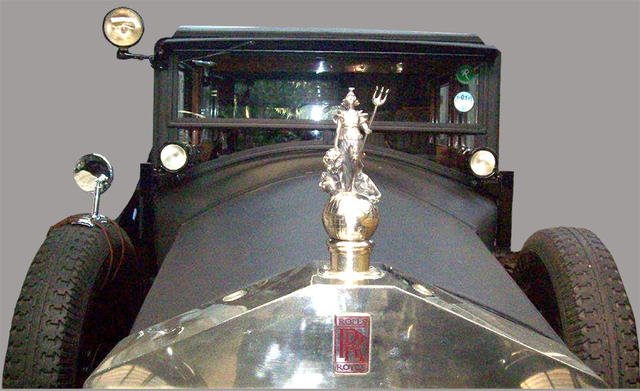
The team poured a room temperature vulcanization (RTV) silicone mold around the pattern. They cut the mold into several sections for easy removal and then used the mold to create a wax pattern. The wax pattern in turn was used in the investment casting process to mold a brass version of the mascot which was coated with nickel.
“The result is a mascot that looks exactly like the original except that when you look closely you see the additional detail and other improvements,” Carter concluded. “The vehicle and mascot remain in the possession of Mr. Overton who has them on display for the public. This project provides a typical example of the seamless digital workflow that we use on a regular basis to bring our clients’ projects to life.”
View the video below for more information.


